Das Beste Betriebssystem ist Micro...
9. Juli 2023 - Lesezeit: 10 Minuten

Der Titel ist natürlich etwas irreführend. Und "das Beste" Betriebssystem gibt es auch nicht.
Aber ich möchte mal ein interessantes Betriebssystem vorstellen.
Es handelt sich natürlich nicht um Microsoft Windows sondern um MiroOS.
Wenn man sich das Logo anschaut, erkennt man dass es von der openSUSE Community kommt.
Einen ersten Überblick gibt's auf der MicroOS Homepage: https://microos.opensuse.org/
Die Features sind natürlich cool und ich möchte hier auf 2 Dinge eingehen
- Atomic Updates
Das Basis System ist "immutable" also unveränderlich.
Dafür wird das Snapshot Feature von dem BTRFS Dateisystem verwendet.
Also kurz gesagt, man kann sich das Betriebssystem nicht zerschießen.
Entweder funktioniert ein Update oder man kehrt auf den letzten funktionsfähigen Stand zurück. - Base System + Container Runtime Environment
Bei der Installation kann man das Basis System inkl. einer Container Runtime auswählen.
Dadurch kann man sofort mit Containerisierten Anwendungen durchstarten.
Installation
Da wir gerade noch von Windows gesprochen haben beschreibe ich mal den steinigen Weg wie man MicoOS unter Windows 11 Professional in Hyper-V installiert.
MicroOS stellt schon ein fertiges Hyper-V Image zum Download bereit: https://download.opensuse.org/tumbleweed/appliances/openSUSE-MicroOS.x86_64-ContainerHost-MS-HyperV.vhdx.xz
Das kann man auch einfach herunterladen...
Leider kann Windows das komprimierte Image nicht entpacken. Also installiert man erst einmal 7-Zip um die Datei zu entpacken.
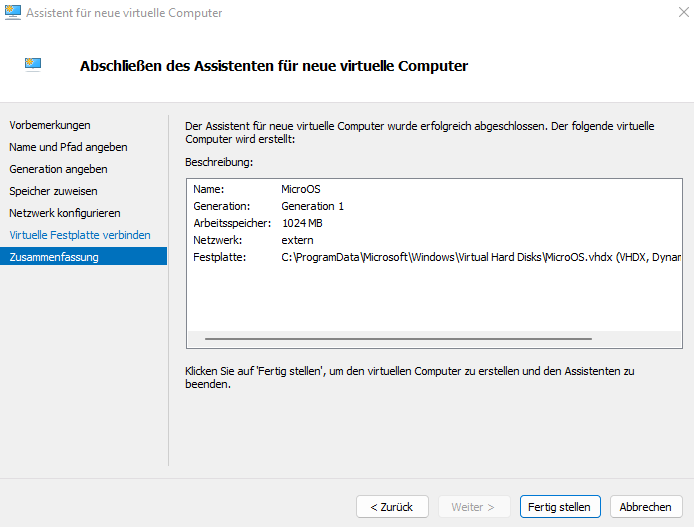
Wenn dieser erste Stein aus dem Weg geräumt ist, dann erstellt man eine neue VM im Hyper-V Manager.
Ich habe zuvor das entpackte Image unter C:\ProgramData\Microsoft\Windows\Virtual Hard Disks\MicroOS.vhdx gespeichert, weil dort bei mir die VMs liegen.
Als Netzwerk habe ich meinen externen Netzwerk Adapter angegeben, damit ich auch Internet habe.
Initiale Einrichtung
Beim ersten Boot von MicroOS muss man ein paar Fragen beantworten.
Aber das ist wirklich einfach, ich würde sogar sagen dass es das einfachste Setup ist was ich bisher gesehen habe.
(Also noch einfacher als bei Alpine Linux ;-)
- First Boot muss nur bestätigt werden ;-)

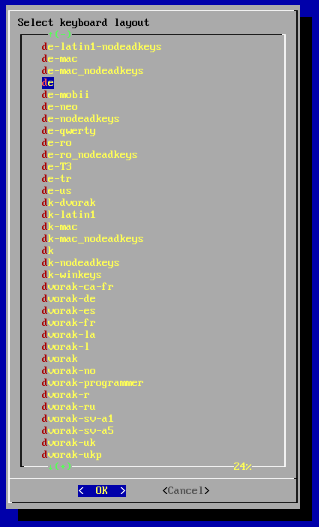
- Keyboard Layout in meine Fall de für deutsch
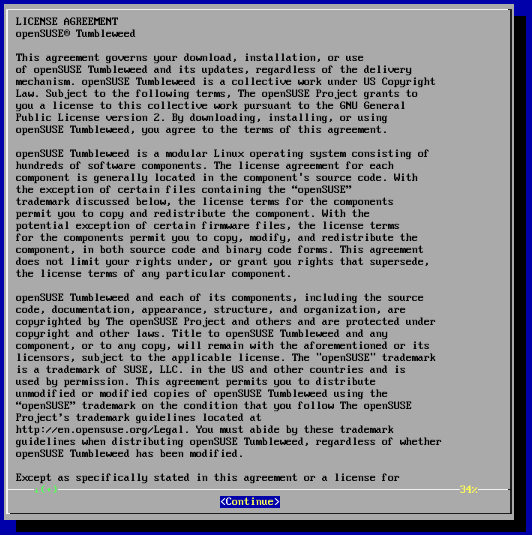
- Lizenzvereinbarung pass schon...
- Zeitzone irgendwo in Europa

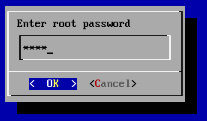
- Root Passwort solltet ihr euch bis zum nächsten reboot merken
SSH Zugriff
Nach einem reboot startet MicroOS und ihr solltet einen Prompt zum Login erhalten.
Außerdem wird noch die IP-Addresse für den Zugriff per SSH angezeigt.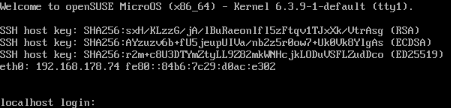
Der Login per SSH von einem anderen Rechner aus funktioniert erst einmal nicht.
Aus Sicherheitsgründen ist die Anmeldung als root mit einem Passwort per SSH nicht erlaubt.
Das macht ja auch Sinn, weil ihr sicher als Root Passwort so etwas wie 1234 eingegeben habt ;-).
# ssh 192.168.178.74
The authenticity of host '192.168.178.74 (192.168.178.74)' can't be established.
ED25519 key fingerprint is SHA256:r2m+c8U3DTYmZtyLL9Z82mkWNHcjkLODuVSFLZudDco.
This key is not known by any other names.
Are you sure you want to continue connecting (yes/no/[fingerprint])? yes
Warning: Permanently added '192.168.178.74' (ED25519) to the list of known hosts.
(root@192.168.178.74) Password:
(root@192.168.178.74) Password:
authorized_keys
Also muss ich meinen Public Key in authorized_keys eingetragen.
Ich mache es mir einfach und hole eine authorized_keys Datei von einem Rechner wo ich schon Zugriff habe.
localhost:~ # cd .ssh
localhost:~/.ssh # scp 192.168.178.200:~/.ssh/authorized_keys .
The authenticity of host '192.168.178.200 (192.168.178.200)' can't be established.
ED25519 key fingerprint is SHA256:ENZ9Q29IdeDcee+e8OJP/jlrho7qwxEGfNiDfurAeFg.
This key is not known by any other names.
Are you sure you want to continue connecting (yes/no/[fingerprint])? yes
Warning: Permanently added '192.168.178.200' (ED25519) to the list of known hosts.
root@192.168.178.200's password:
authorized_keys                                                                                    100%  575    86.2KB/s   00:00
Jetzt funktioniert der Login ohne Passwort
Container Runtime
Die Vorinstallierte Container Runtime ist Podman. Man kann sofort loslegen.
Es gibt also keine Einstiegshürde mehr für den Start eines Containers. So wünsche ich mir das.
localhost:~ # podman run hello-world
Resolved "hello-world" as an alias (/etc/containers/registries.conf.d/000-shortnames.conf)
Trying to pull quay.io/podman/hello:latest...
Getting image source signatures
Copying blob bdb68ac15c4d done
Copying config 88ec1c895e done
Writing manifest to image destination
Storing signatures
!... Hello Podman World ...!

         .--"--.
       / -     - \
      / (O)   (O) \
   ~~~| -=(,Y,)=- |
    .---. /`  \   |~~
 ~/  o  o \~~~~.----. ~~
  | =(X)= |~  / (O (O) \
   ~~~~~~~  ~| =(Y_)=-  |
  ~~~~    ~~~|   U      |~~

Project:   https://github.com/containers/podman
Website:   https://podman.io
Documents: https://docs.podman.io
Twitter:   @Podman_io
immutable
Wozu braucht man eigentlich ein Immutable Betriebssystem?
Sagen wir mal ich will das Software Paket htop installieren, dann ist das so nicht möglich!
localhost:~ # zypper install htop
This is a transactional-server, please use transactional-update to update or modify the system.

Also ich muss ein transactional-update durchführen.
Das heißt das Update wird in einer Transaktion durchgeführt
und steht auch erst nach einem Reboot zur Verfügung.
localhost:~ # transactional-update pkg install htop
Checking for newer version.
transactional-update 4.3.0 started
Options: pkg install htop
Separate /var detected.
2023-07-09 12:44:03 tukit 4.3.0 started
2023-07-09 12:44:03 Options: -c1 open
2023-07-09 12:44:03 Using snapshot 1 as base for new snapshot 2.
2023-07-09 12:44:03 No previous snapshot to sync with - skipping
Relabeled /var from system_u:object_r:unlabeled_t:s0 to system_u:object_r:var_t:s0
Relabeled /var/lib from unconfined_u:object_r:unlabeled_t:s0 to unconfined_u:object_r:var_lib_t:s0
ID: 2
2023-07-09 12:44:05 Transaction completed.
Calling zypper install
Relabeled /var/lib/ca-certificates from unconfined_u:object_r:var_lib_t:s0 to unconfined_u:object_r:cert_t:s0
Relabeled /var/log from unconfined_u:object_r:var_t:s0 to unconfined_u:object_r:var_log_t:s0
2023-07-09 12:44:08 tukit 4.3.0 started
2023-07-09 12:44:08 Options: callext 2 zypper -R {} install htop
2023-07-09 12:44:09 Executing `zypper -R /tmp/transactional-update-D0dmtS install htop`:
Loading repository data...
Reading installed packages...
Resolving package dependencies...
The following NEW package is going to be installed:
  htop
1 new package to install.
Overall download size: 183.4 KiB. Already cached: 0 B. After the operation, additional 383.5 KiB will be used.
Continue? [y/n/v/...? shows all options] (y): y
Checking for file conflicts: [...done]
Warning: 1 package had to be excluded from file conflicts check because it is not yet download.
    Note: Checking for file conflicts requires not installed packages to be downloaded in advance in
    order to access their file lists. See option '--download-in-advance / --dry-run --download-only'
    in the zypper manual page for details.
Retrieving: htop-3.2.2-2.1.x86_64 (openSUSE-Tumbleweed-Oss) (1/1), 183.4 KiB
Retrieving: htop-3.2.2-2.1.x86_64.rpm [............................done (618.3 KiB/s)]
(1/1) Installing: htop-3.2.2-2.1.x86_64 [..done]
2023-07-09 12:48:08 Application returned with exit status 0.
2023-07-09 12:48:08 Transaction completed.
Trying to rebuild kdump initrd
2023-07-09 12:48:10 tukit 4.3.0 started
2023-07-09 12:48:10 Options: close 2
2023-07-09 12:48:12 New default snapshot is #2 (/.snapshots/2/snapshot).
2023-07-09 12:48:12 Transaction completed.
Please reboot your machine to activate the changes and avoid data loss.
New default snapshot is #2 (/.snapshots/2/snapshot).
transactional-update finished
Aber wiso ist so eine Installation jetzt besser? Auf den ersten Blick ist das doch umständlicher!
Die Idee ist, dass Software gar nicht mehr auf dem Basis Betriebssystem installiert wird
sondern nur noch als Flatpack oder als Container installiert wird.
Und falls mal etwas schief geht hat man immer einen Snapshot auf den man zurückgreifen kann.
Das passiert sogar automatisch wenn das System nicht richtig bootet.